Well, Damit is ready to start. Only a few more weeks to tie up some loose ends at work then we are off.
In getting Damit ready for an Iron Butt ride,. there were a lot of changes required in order to endure 10-12 hours of daily riding. The best money spent is worth nothing if it does not increase rider comfort or functionality of the machine for the task ahead.
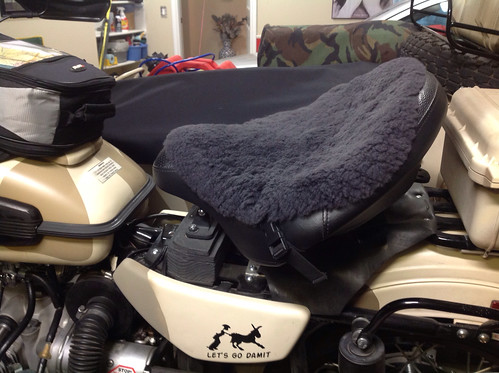
COMFORT: A good seat that supports and cradles, with no pressure points is worth it's weight in gold in the last three riding hours each day. Found a Harley Davidson Police seat with shock absorber. After raising the mount and moving it rearward, it now fits my tall frame.
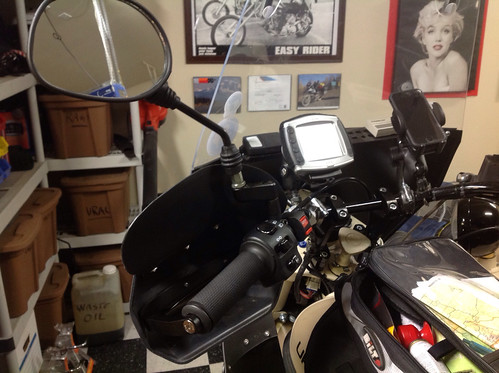
With a tall seat, the handlebars were too low, putting too much pressure on the palms. A light touch to control the machine is best for long hauls.
Tried a one inch riser, but was still too low. Again eBay to the rescue. Found a 5" Rox riser. Perfect fit. The only problem was now the stock clutch cable was too short. Had to order a 5+ custom cable from MotionPro in California. That worked.
In that photo you can also see the Garmin 550 GPS and iPhone, both on Ram mounts. Added the mirror mount extensions so I can see more than just my arms while riding. The added handlebar brush guards with rain defectors keep the rain from getting up the sleeves while riding. Also blocks the cold wind.
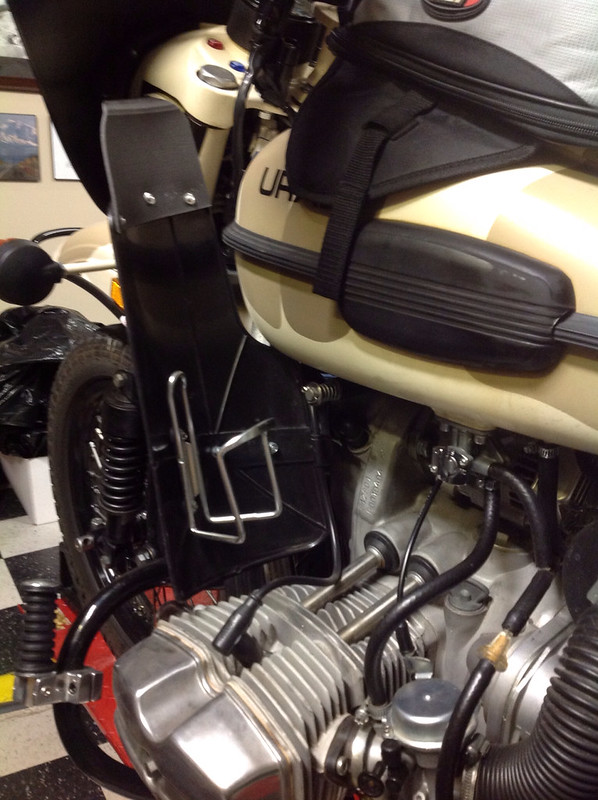
Next leg guards with a water bottle holder to stay hydrated. The leg guards were too short, allowing wind to hit the legs, so added an extension. The left highway peg can be seen here too.
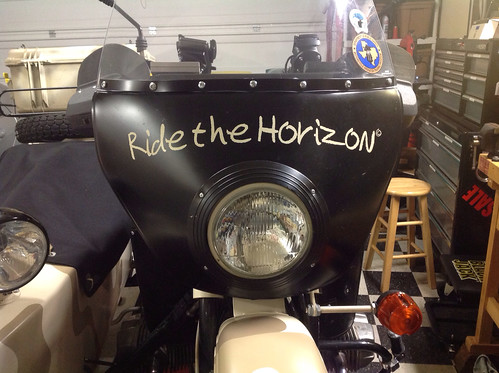
The stock windshield did not block the wind from buffeting the helmet so added a Laminarlip. Helmet is vibration free now.
Moved the right foot peg rearward, now welded to the rear brake pivot point. Added a rain defector under the left cylinder to eliminate water coming off the front tire.
SAFETY: Visibilty is a priority to me, especially if I have to ride in the rain or at dusk. Upgraded the headlight to a Bosch H4, added two Hella 500 auxilary lights, one pointed straight ahead, the other angled off to the right to illuminate the road shoulders for deer or other critters who might be thinking about crossing in front of me.
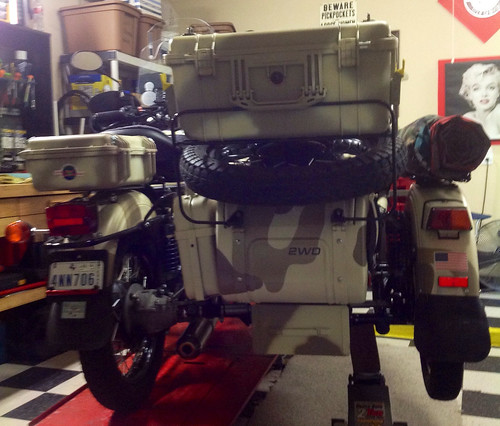
Now some might comment about carrying gas cans exposed to right side impact, but remember, there are five gallons on gas between my legs, exposed to a left side impact. That is an unmounted spare tire strapped under the sidecar.
Added a flashing LED brake light to the rear as well as reflector tape.
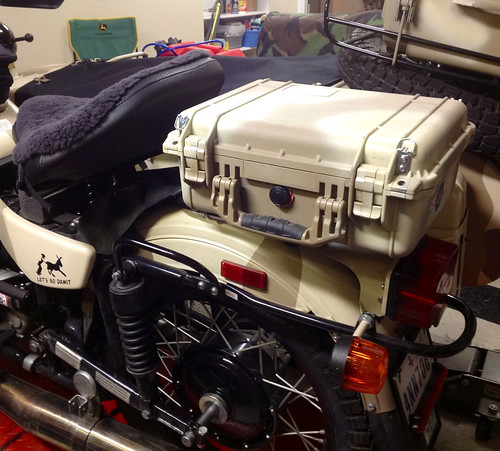
FUNCTIONALITY: Added two waterproof Pelican cases, one large on the luggage rack for personal clothing and gear. The smaller case is mounted behind the seat, and is wired to recharge camera batteries, iPad and cell phone. Also added a steel ammo case under the rear of the sidecar for heavy items in order to lower the center of gravity.
All tools and parts are packed into the truck of the sidecar, including a scissor jack, air compressor, come-along and numerous hand tools.
After removing the seat in the sidecar, it now contains the tent, sleeping pad, sleeping bag, cook stove, water, foodstuff, cold weather riding gear, rain gear, rig cover, machete and ........ fire starter. The plan is to camp as much as possible, only staying in motels when cold and WET.
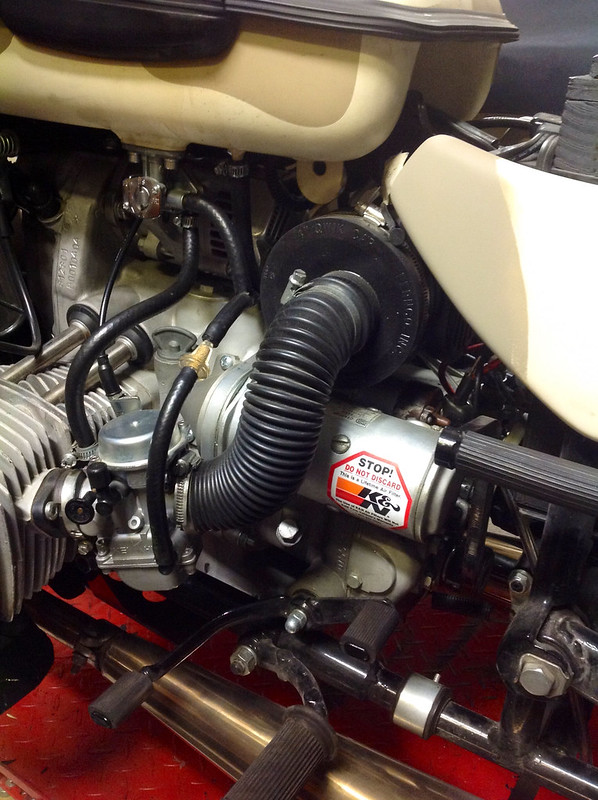
The new homebuilt airbox is working well. Has a K&N MG-0200 air filter, with easy access for checking and / or cleaning. Connecting the airbox to the carbs are John Deere flexible hoses that do not come off or loose when accidently kicked. With the free-flow air filter and losing the exhaust CAT extensions, have upped the main jet to 142.5, one needle shim, stock idle jets, dropped to a cooler spark plug, NGK BP6HS. Running strong. Hopefully mpg will increase as the rig gets settled in. Only have 2000 km now.
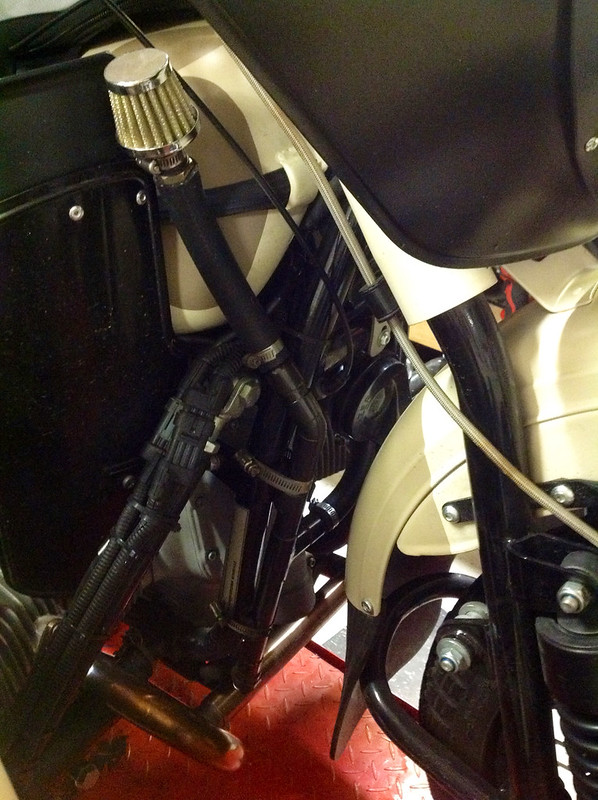
With the new air box, could not vent the crankcase to the airbox. Searched Soviet Steeds for a solution, found this idea. With a little variation, it works great. Routed the filter up high and behind the windscreen so rain would not affect it. A bit hard to see in the photo, but the crankcase is vented to the side of a copper "T" tube, oil and water fall to the lower section of the T, which has a screw cap for draining the tube. The upper end of the T follows a rubber hose to the small filter for venting.
Under the seat and ahead of the small Pelican case is a fuseblock for powering the auxilary items: GPS, louder FRAMM horn, battery charger, lights, etc.
While the rig may not be the most beautiful, but it is very functional and easy to repair if need be. Those are my only requirements when facing an Iron Butt ride.
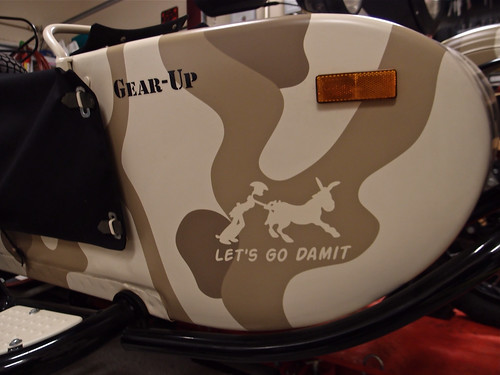
The last two farkles are pure ego, personal and meaningful.
Damit was a mule that carried my cargo when I lived and worked with an indian tribe in the mountains of Panama in the late sixies.
Ride The Horizon
Ride on forever for soon
Life will be long gone.
Peace ya'll
CCjon

Get a SPOT and an account on Spotwalla. Good luck on the Dalton! hondotx.blogspot.com
ReplyDeleteThanks Hondo
ReplyDeleteGot a SPOT, will ck out spotwalla.
You going to the TURD rally? If so, see you there.
I did something similar with my 2011 URAL Gear Up seat ... picked up a Raceway version (not as good as HD Police) and moved it up and to the rear ... so, my 6'1" frame actually fits the bike much better. Have extra cans and other mods that I will do this summer. In the meantime, look forward to following your blog entries. Take care, Doc
ReplyDeleteWow, you really farkled up that rig! Good stuff! I am intrigued as to the 5" risers but so far, my handlebars seem to be treating me OK. I liked the crankcase venting you came up with, clean. Though I will be curious to see how it does in freezing wet weather. I had to mod mine accordingly, now waiting for next wet/snowy ride to prove the concept.
ReplyDeleteI really like the way you're carrying the spare gas cans, much more secure than the straps I am using. Must look into something similar methinks.
dom
Same here with the risers ... intrigued. I did about one inch riser that worked for me with my 36" plus long arms. I ended up moving my seat up about 1.5 inches and back about 3.5 inches or so using galvanized perforated square stock from Lowes. Made a world of difference.
DeleteCCjon good luck with the trip it sounds awesome. Your mods look great. The sparkplugs you are using are in fact hotter than stock, if you wanted cooler you should have gone to BP8HS - if you ride hard watch out for holing the pistons with the hotter plugs. Be careful with the handlebar risers as the additional height puts extra strain on the single mounting point of the brackets - (don't ask how I know)...
ReplyDeleteSorry for the delay in answering, went to the TURD (Texas Ural Riders Division) Rally on Toledo Bend Reservoir this weekend. Got to meet some infamous Ural riders and mod'ers.
ReplyDeleteThanks Doc, hope to make the reports from the road entertaining and informative.
Doc and Ryno, the taller risers feel firm and unmoving. Don't plan to ride rough off road. Slow, firm and steady I'm told is the secret to long distance on a Ural according to URAL CT who has put over 122,000 km on his Patrol. That is the voice of experience to heed.
Ryno, thanks for the tip. Mechanic told me the BP6HS was colder than the BP7HS I was using. Will check it out, thanks.
Dom, really love your photos and Alaska ride report. Glad to read you are back on the road. If you have a choice, stay in Wiseman rather than Coldfoot on your way up to Deadhorse. Much better facilities at a lower price.
Am thinking with the 11.5 gallon capacity, I will need more because current mpg is 21-23. It's 245 miles from Coldfoot to Deadhorse. That doesn't leave a margin for error, spillage or high winds that could leave me stranded.
Have you notice your mpg increasing or decreasing the further north you went?
Re MPG, I've seen a slight increase(no real data yet).
DeleteRunning now with power arc aftermarket ignition since Oregon.